Building Assemblies
Creating an Assembly
The steps to build an assembly are identical regardless of the type of assembly you are building. The only changes are to the formulas and whether or not you use the grid.
To create an assembly:
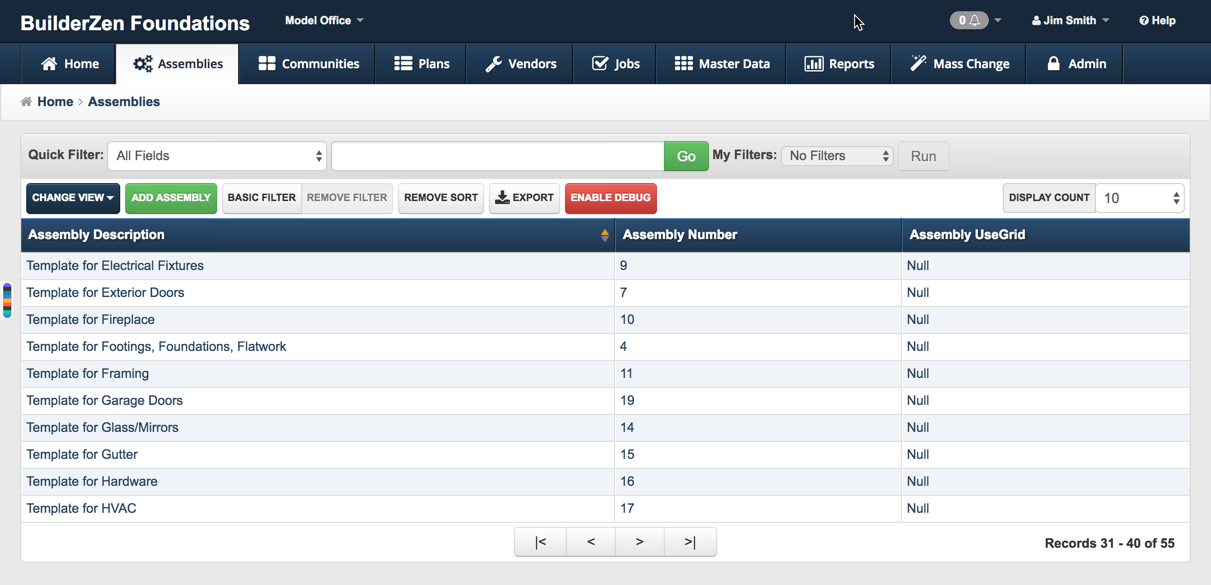
Click Assemblies on the main menu to navigate to the assembly browser.
Click the Add Assembly button in the browser toolbar.
- Enter the Assembly Detail information by following the steps below:
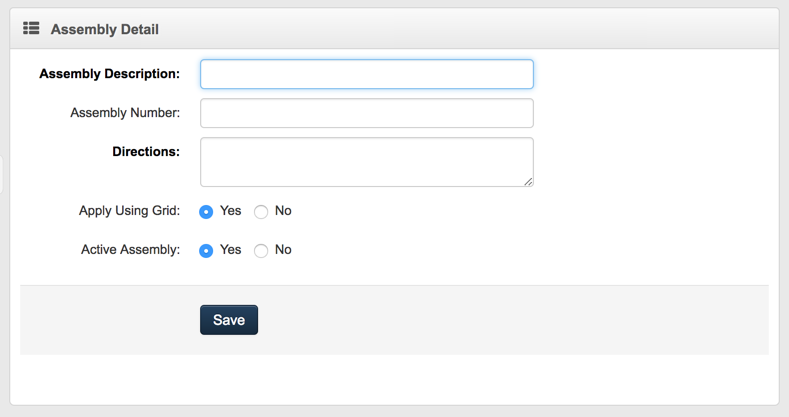
Enter the Assembly Description. (Required)
Enter the Assembly Number. (Optional)
Enter Directions for calculating the assembly based on the mass property or override information.
Example
"Enter the linear feet of 8 foot wall."
OR
"Enter the count of cabinet boxes."
Choose Yes or No to designate whether the assembly is active or not. Yes is the default.
Choose Yes or No to designate whether you want to use the Grid feature. Yes is the default.
Click Save.
Adding Items to an Assembly
After the assembly is built, the next step is to add items the assembly. Assembly items define the material (cost code, item, choice) that will be used to build resulting takeoff items when the assembly is applied to a given plan or community layer. The item quantities are calculated later when the assembly is applied to a given layer.
To add items to an assembly:
Click the Items link at the top of the Assembly Detail screen.
Click the Add Assembly Item button in the browser toolbar.

- Enter the Assembly Item Detail information by following the steps below:
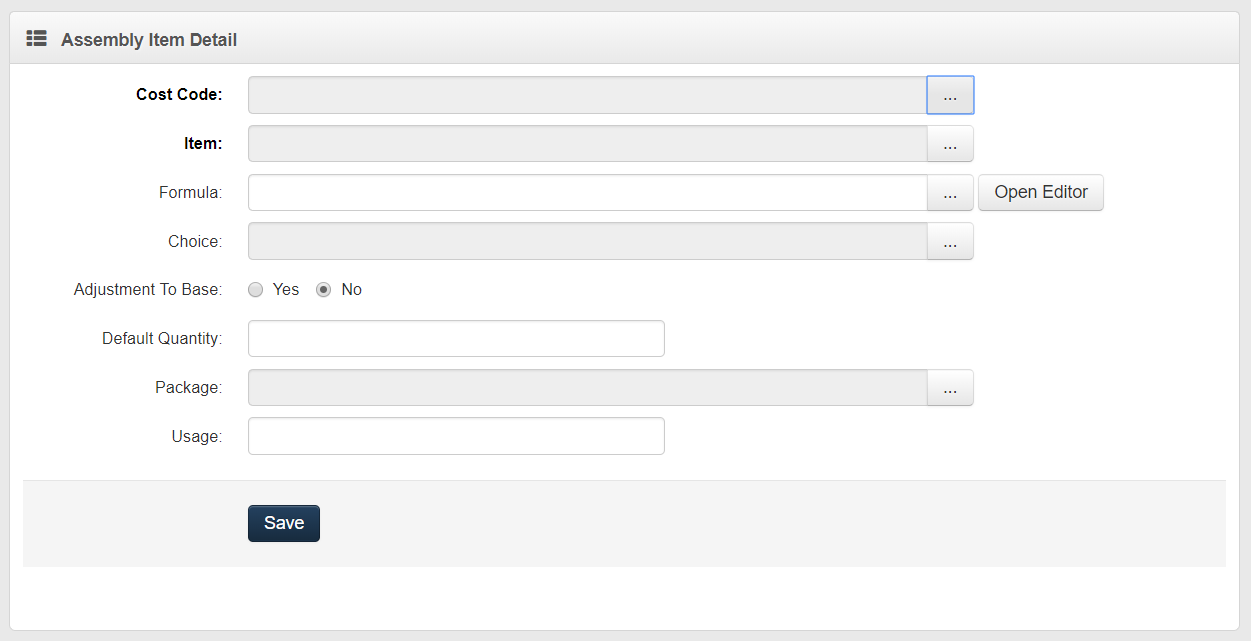
- Click the pick list button to pull up cost code list and select the Cost Code for the assembly item. (Required)
Note
Cost codes must be entered into the Master Data section before adding assembly items.
- Click the pick list button to pull up the item list and select the Item for the assembly item. (Required)
Note
Items must be entered into the Master Data section before adding assembly items.
- Enter the Formula in the formula field by single clicking on the pick list button and choosing from the pop up list. (Formula or Default Quantity is required.)
Note
Only those formulas that have been entered in the Master Data section will be displayed in the pick list.
Formulas can be added on the fly in this field but will not be automatically added to the pick list.
Reusable formulas can be entered in Master Data > Formulas under the Assemblies section.
Tip
When entering formulas for assembly items, enter mass properties/variables that are specific to that item/material or that item category.
For example, if we were creating a flooring assembly with all the different possible flooring choices (carpet, tile, vinyl, hardwood, etc.), for our carpet assembly items we might use a formula of Carpet_SY * 1. This same formula can be used for all levels of carpet since the quantity calculation is based on the square yards of carpet, regardless of the level.
However, our tile and hardwood quantities might be based on square feet. So, for those assembly items, we would do the following:
- For the tile assembly items, we might enter
Tile_SF * 1. - For hardwood assembly items, we might enter
Hardwood_SF * 1.
When you apply an assembly to a given layer to build takeoff items, you will be prompted to enter values for the mass properties/variables defined in your assembly item formulas (Carpet_SY, Tile_SF, Hardwood_SF, Vinyl_SY). By defining separate mass properties/variables you can easily control the different resulting takeoff item quantities.
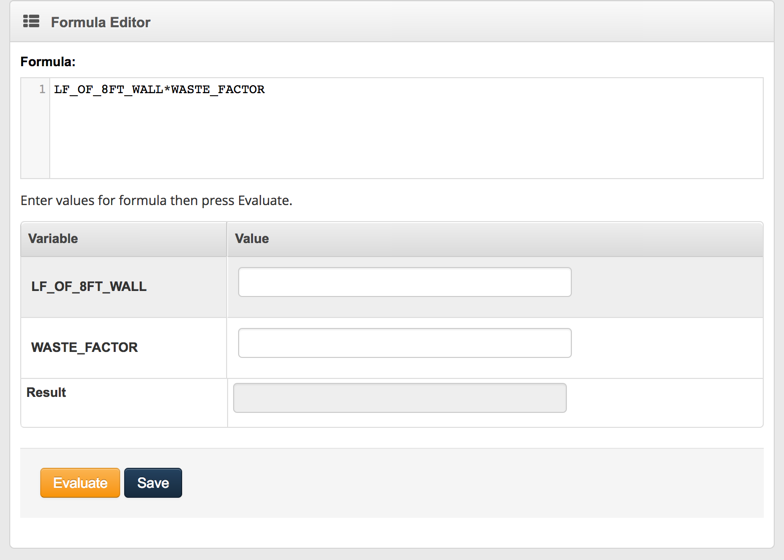
- Click the Open Editor button next to the Formula field to edit and test a formula before applying it to an assembly item. See below to view a sample test screen.
- Click the pick list button to pull up the choice list and select the Choice for the assembly item. (Optional)
Notes
If the takeoff item will ALWAYS be used, regardless of customer selection or community standard features, no choice is required.
Choices must be entered into the Master Data section before adding assembly items.
Choose Yes or No to designate an item as an adjustment to base.
Click the pick list button to pull up the package list and select the Package for the assembly item. (Optional)
Examples:
“1st Lumber Package”, ” 2nd Lumber Package”, etc.
Notes: Packages must be entered in the Master Data section before adding assembly items.
- Examples of info that might be entered in this field are It can be used for divisions that do not have a separate cost code for each draw.
Enter the Usage. (Optional)
Click Save.
Note
The pick list data comes from the Master Data section on the main menu. The fields whose labels are in bold print must be completed before the record can be saved.
When building a pick one assembly, enter the material required if that choice is selected. Do not worry about intersections or removal of standard material. The design of the pick one feature, in conjunction with the grid feature, will account for all of these changes.
- For each factor entered in the formula, you will be prompted to designate each as either a mass property (variable) or a factor (constant):
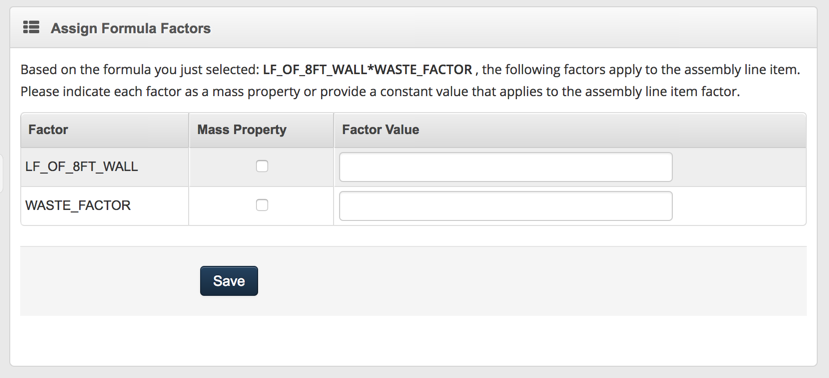
Designate each factor as a mass property (variable) or a factor (constant) by:
Clicking the checkbox in the Mass Property column.
OR
Entering a constant value in the Factor Value column.
Note
If the factor (i.e. UOM_Divisor) is something that should be entered when the assembly is added to a layer, check the mass property box. If the factor is constant, enter a factor value.
- Click Save.
Editing Assemblies
Assemblies allow users to enter time consuming information once, so all that is needed for each new plan are the unique plan quantities. Assembly items may be edited at any time. Each change to an assembly item requires that the user select a Data Change Reason prior to making the change.
Note
Grid Assemblies allow users to pull in changes made to an assembly (after it has been used to build takeoff items) and then update the affected takeoff items automatically.
Standard Assemblies (non-grid) do not have the capability to automatically update takeoff items.