Using Grid Assemblies
Grid Assembly Benefits
Using Grid Assemblies to build takeoff items presents numerous advantages.
Grid Assemblies allow users to:
Enter mass quantities/variables a single time (the system remembers each quantity).
Select multiple rooms to appear in the grid (prompts indicate where to enter distinct quantities for every room).
Open the grid again at any time and change the quantities.
Build basic grid assemblies and use them to create complex assemblies quickly and easily.
Grid Assemblies are particularly useful when combined with Pick One Categories. The user can enter all items from a pick one category at once, for as many rooms as necessary, without ever changing screens.
Example
Consider a pick one, flooring grid assembly that includes these five takeoff items:
- Carpet Level 1
- Carpet Level 2
- Carpet Level 3
- Tile Level 1
- Tile Level 2
If this is a grid assembly, select which takeoff items apply to which rooms. If the upgrade to the carpet in the living room needs to match the carpet in the bonus room, then the bonus room needs to be selected as a choice intersect under living room. Then enter the number of square yards of carpet and tile needed for each room. There is no need to enter the same information for the bonus room.
The system will automatically create all 30 takeoff items, and because the bonus room takeoff items intersect with living room takeoff items, the appropriate number of carpet square yards will automatically populate based on the carpet selection in the living room. If customer does not opt to have a bonus room, however, no carpet details would populate in the bonus room field.
Notes
When dealing with more complex materials such as foundations and frame material, it is best to use the standard add for assemblies. The grid does not allow a user to override the quantities as they are added. It instead uses the formulas as currently entered at the time of the update.
Grid Assemblies automatically create the necessary choice intersections/combinations based on the choices defined on the assembly items and the choices selected when applying the grid assembly. This is another benefit of using grid assemblies - users do not have to think about defining all the possible choice combinations. Instead, users simply select the applicable rooms and choices available in those rooms and the system takes care of creating the necessary choice intersections and resulting takeoff items.
Building Takeoff Items with Grid Assemblies
To build takeoff items with a grid assembly:
First, make sure you have created an assembly with Apply Using Grid set to Yes.
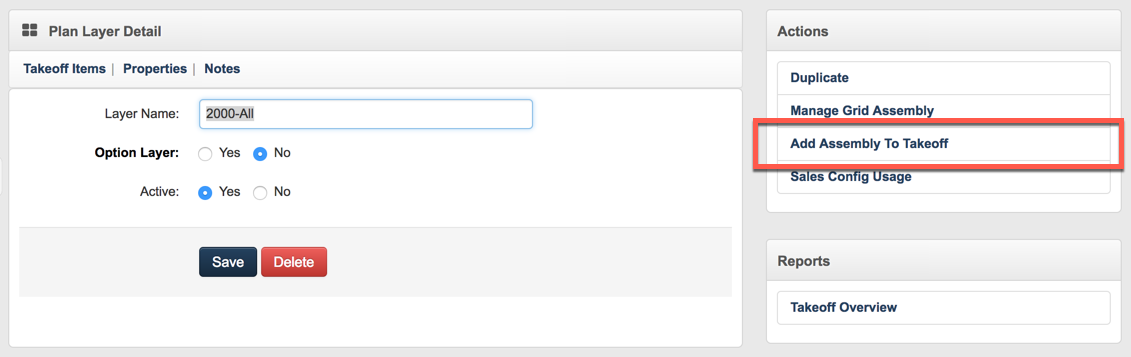
Navigate to the plan or community layer where you would like to build takeoff items and click Add Assembly to Takeoff in the right-hand Action pane.
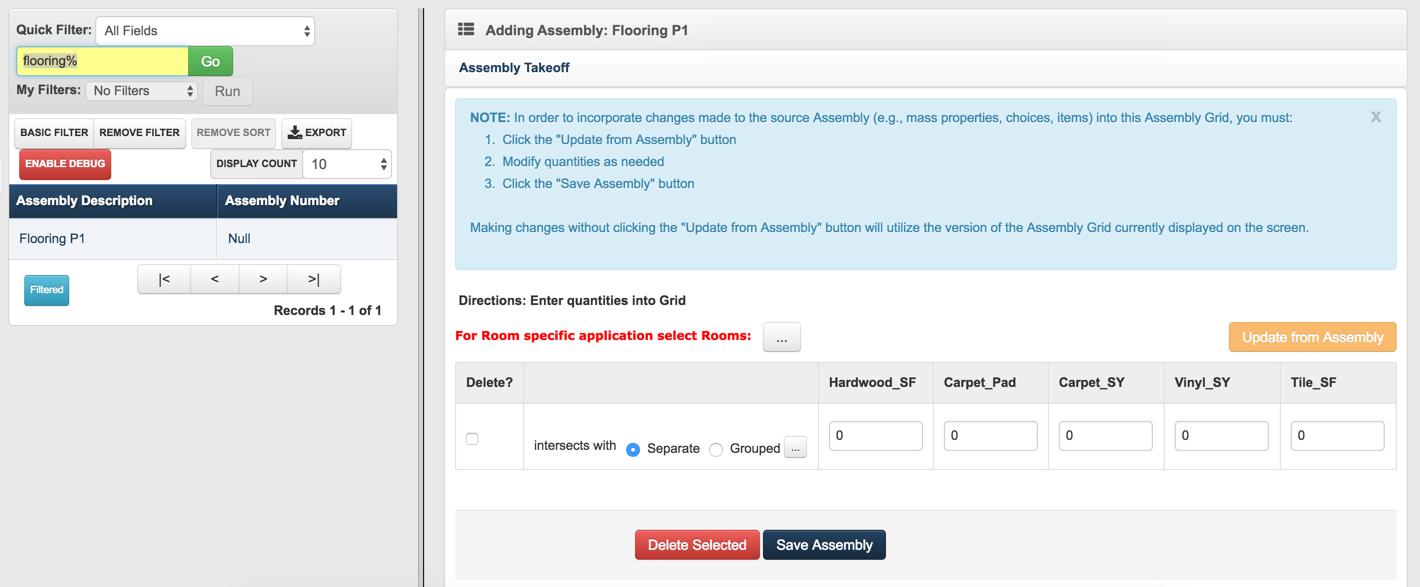
- On the next screen, click the Grid Assembly you want to apply in the left-hand pane to bring up the grid.
Note
When applying a grid assembly, takeoff items will not be displayed. Run reports to see the takeoff items, and, after adding, review the items that were added to the plan. The grid is saved for later viewing and allows the user to refresh the grid if the assembly has been edited.
The mass properties are listed vertically. If room is not required for these takeoff items, simply enter the mass properties/variables.
Create any needed choice combinations/intersections:
If items in this assembly can be combined with or are affected by another choice, use the pick list to select the applicable choices.
If items in the assembly can be combined with or are affected by multiple choices at the same time, switch the button to Grouped before using the pick list. By doing this, all of the choices selected from the list will be combined into one choice combination/intersection and all must be in the Job Budget before the material will come in.
For each intersection that is created you will be able to enter additional information on the mass properties, thus the quantities on the material can vary for each intersection.
If the assembly contains room-specific takeoff items, click on the pick list button at the top of the screen and select the appropriate rooms.
- The order in which the rooms are selected is the order in which the rooms will appear in the list. The screen below shows a grid with room and a choice combination/intersection selected:
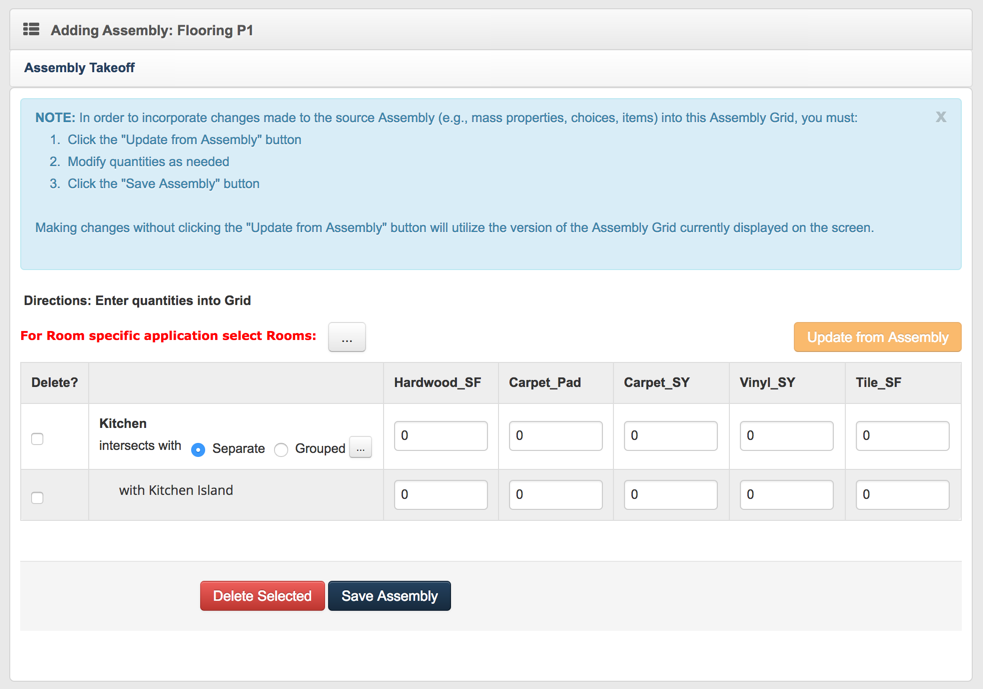
Separate numbers are entered for each room/mass property.
Choice combinations/intersections can be added to each room, just as listed for the non-room example.
If choice combinations/intersections are added, then the takeoff items for that intersection will be linked to the room they are selected under.
Enter correct quantities into the mass property fields.
Save.
Note
Separate takeoff items will be created for each room and choice combination/intersection.
Updating Takeoff Items with Grid Assemblies
Each time a grid assembly is used to build takeoff items, its state (the values entered, selected rooms and choices) is saved in the system. Rooms and choice combinations/intersections can be added or removed from the Manage Grid Assembly link on the Plan Layer Detail or Plan Detail page. If the assembly has changed since it has been applied (i.e. item have been added, removed, updated, formulas have changed, etc.), use the Manage Grid Assembly link to pull the assembly changes into the takeoff items and update all of the takeoff items built from the grid assembly.
To update takeoff items built using a grid assembly:
Click Manage Grid Assembly from either the Plan Layer Detail or Plan Detail screen.
Select the assembly for which you would like to update takeoff items.
Change the necessary information (e.g., quantities, rooms, choice combinations/intersections).
Click Save.
To update the assembly when the assembly itself has changed:
On the Manage Grid Assembly screen, click Update From Assembly.
Click OK.
Click Save.
Note
If a user manually changes takeoff items that were built using the grid, changes will be wiped out when the grid is updated.
Checking the box to the left of the row then clicking Delete Selected will delete that row and, upon saving, the linked takeoff items. If Delete Selected is not clicked, the information will not be deleted.
If all rows are deleted, all takeoff items built using the assembly will be deleted from the affected plan or community layer.