Sales Configurations
Plan Sales Configurations represent sellable plan configurations that can be sold in a given Community.
Typically, Plan Sales Configurations consist of a base layer and an elevation layer to bring all of the takeoff items together in the appropriate combination. Plan Sales Configurations may also contain other shared "interchangeable" layers, such as two or three car garage or deck layers that can be used with multiple plan configurations.
Every plan allows choices and combinations for what is needed for each specific floorplan budget. Plan Sales Configurations integrate previously built Plan Layers into units ready to sell or budget. For the different types of construction, the following configurations are possible:
Single Family Configurations
One configuration per plan, plus elevation.
Three configuration layers:
- Base
- Elevation
- Any general layers
Plan Example
The Plan 2000 could have the following layers:
- Base
- Elevation A
- Elevation B
- Elevation C
Plan General Example
A builder can also have a "general" plan with the following layers:
- General items (items that are the same in every plan)
- 2-bathroom home (items that are the same for every 2-bath home)
- 3-bathroom home (items that are the same for every 3-bath home)
Plan Sales Configuration Example
The plan configurations for the Plan 2000 would be:
- Plan 2000 Elevation A
- Plan 2000 Elevation B
- Plan 2000 Elevation C
Each of the plan configurations would use the Plan Layers that contain the items needed to build that particular version of the plan. Assuming that the Plan 2000 is a two bath home, it would include the following plan configurations, with the layers listed below attached:
Plan 2000 Elevation A
- Base (from Plan 2000)
- Elevation A (from Plan 2000)
- General Items (from Plan General)
- 2-Bathroom home (from Plan General)
Plan 2000 Elevation B
- Base
- Elevation B
- General Items
- 2-Bathroom home
Plan 2000 Elevation C
- Base
- Elevation C
- General Items
- 2-Bathroom home
Multi-Family Configurations
In multi-family construction, plan configurations are essential for the individual units. A plan configuration for the building is also needed.
Example
In a 4-unit building with two distinct units, and each unit could be a corner or an interior unit, the following layers would exist:
- 4-Unit Building – hold the takeoff items to build the shell
- Unit – holds the takeoff items that are the same in Unit A and B
- Unit A – hold the takeoff items unique to Unit A
- Unit B – holds the takeoff items that are unique to Unit B
- Corner Unit – holds the takeoff items unique to corner units
- Interior Unit – holds the takeoff items unique to an interior unit
The following plan configurations can then be created, one for the building itself, and one for each different version of the units that a customer could purchase:
- 4-Unit Building Shell
- Unit A – Interior
- Unit A – Corner
- Unit B – Interior
- Unit B – Corner
Each of the plan configurations would use the layers that contain the items needed to build that particular version of the plan. In the multi-family example, the following plan configurations and layers would be attached:
- 4-Unit Building Shell
- 4-Unit Building
- Unit A – Interior
- Unit
- Unit A
- Interior
- Unit A – Corner
- Unit
- Unit A
- Corner
- Unit B – Interior
- Unit
- Unit B
- Interior
- Unit B – Corner
- Unit
- Unit B
- Corner
Each layer in this example is now a piece of the whole configuration and can be used repeatedly.
Adding Configurations
To add configurations:
Click the Plans tab in the main menu.
Click the appropriate Plan Number or Plan Name.
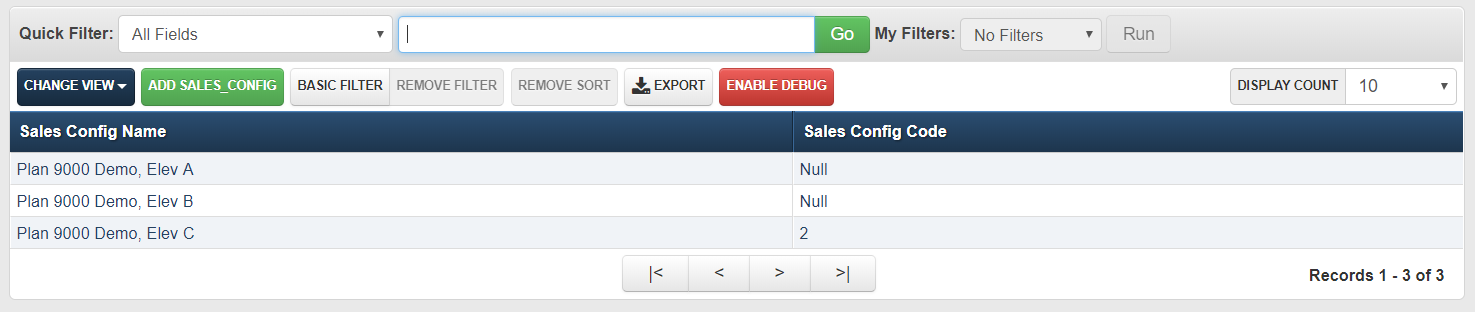
Click the Sales Configurations link at the top of the plan detail screen to navigate to the sales configuration browser (shown below).
- Click the Add Sales Config button in the browser toolbar to navigate to the sales configuration detail screen (shown below).
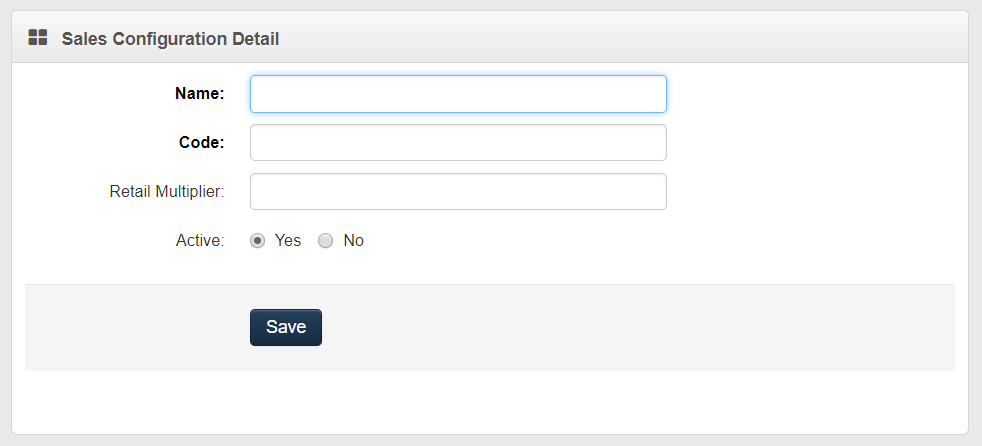
- Enter the Sales Configuration Detail information by following the steps below.
Enter the configuration Name.
Select Yes or No for active configuration (record). By choosing No, the configuration will not be shown in the standard configuration browser view and cannot be chosen from any pick lists.
Click Save.
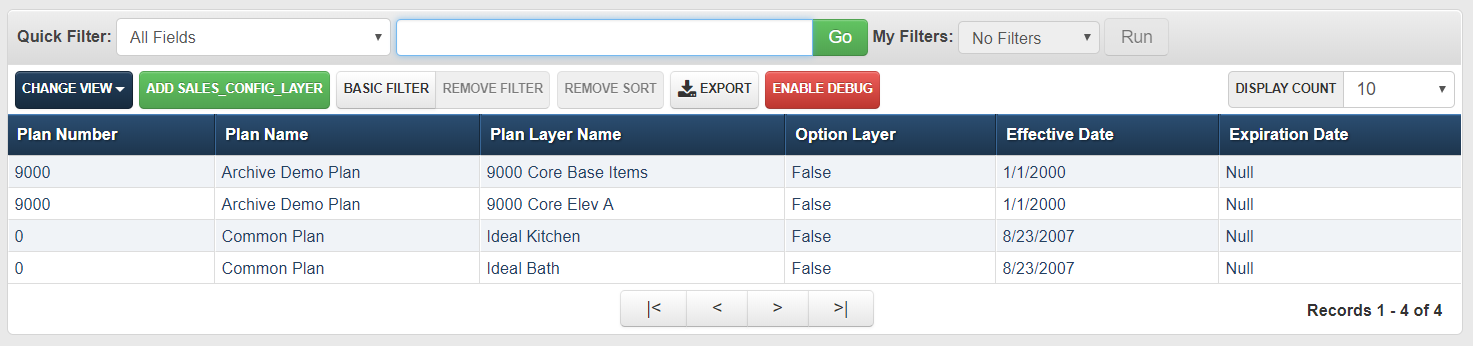
Click the Configuration Layers link at the top of the plan sales configuration detail screen to navigate to the sales configuration layer browser (shown below).
- Click the Add Sales Config Layer button in the browser toolbar to navigate to the sales configuration layer detail screen (shown below).

Enter the Sales Config Layer Detail information by following the steps below:
Click the picklist button to choose sales configuration layers.
Click the appropriate plan layer and the field will be populated with the layer. (Required)
Note
The list contains all layers from all plans.
Enter the Effective Date. (Required)
Enter the Expiration Date. (Optional)
Click Save. Repeat until all appropriate layers are entered.