Takeoff Items
Once the structure of the plan is in place you can begin adding takeoff items. Takeoff items can be added manually or via assemblies. Assemblies allow for quick, efficient creation of takeoff items, however you will probably always need to add some items manually.
Takeoff items include everything needed to build a plan. This includes standard and optional material. The first step in adding takeoff items is to decide which layer to enter the items in. The key question here is “when does my material or quantity change?”
Note
Builders are strongly encouraged to decide and document the layers in which the various types of material belong.
Rules for Takeoff Items
Takeoff items should be entered into the layer that will allow for the greatest level of reuse:
Rules
- If a takeoff item is identical in every Plan in your company, it would be entered in a Plan General layer.
- If a takeoff item is identical in every plan in a product line, it would be entered in a Product Line layer.
- If a takeoff item is identical in every elevation of a plan, it would be entered in a Base Plan layer.
- If a takeoff item changes with every elevation, it would be entered in an Elevation layer.
Following these rules will optimize your reuse and limit the time spent in maintenance.
Takeoff Items and Choices
When building takeoff items, selecting the choice is critical to the takeoff item pulling in to the correct community and option selections. Choices allow estimators to build takeoff items once, but mark them as standard in one community and optional in another.
Follow these rules when selecting the choice:
Rules
- Do not use a choice if the takeoff item is standard in every community the layer is used in and cannot be upgraded.
- Use a choice if the material is standard in every community the layer is used in but the material can be upgraded.
- Use a choice if the material is ever optional.
- Use a choice if the material is standard in some communities but not others.
- Use a choice intersection if the material is only used if more than one choice is selected.
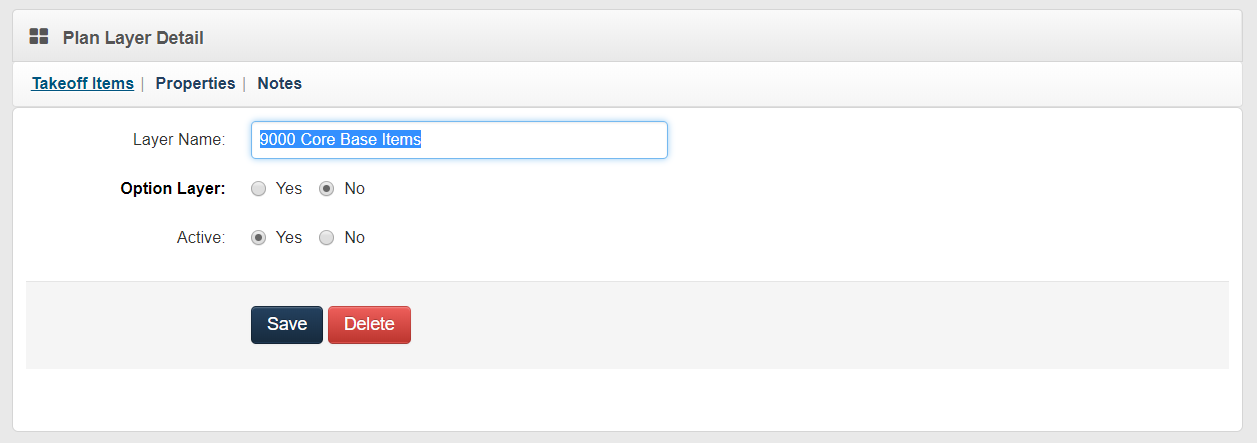
Adding Takeoff Items
- Navigate to the desired Plan Layer.
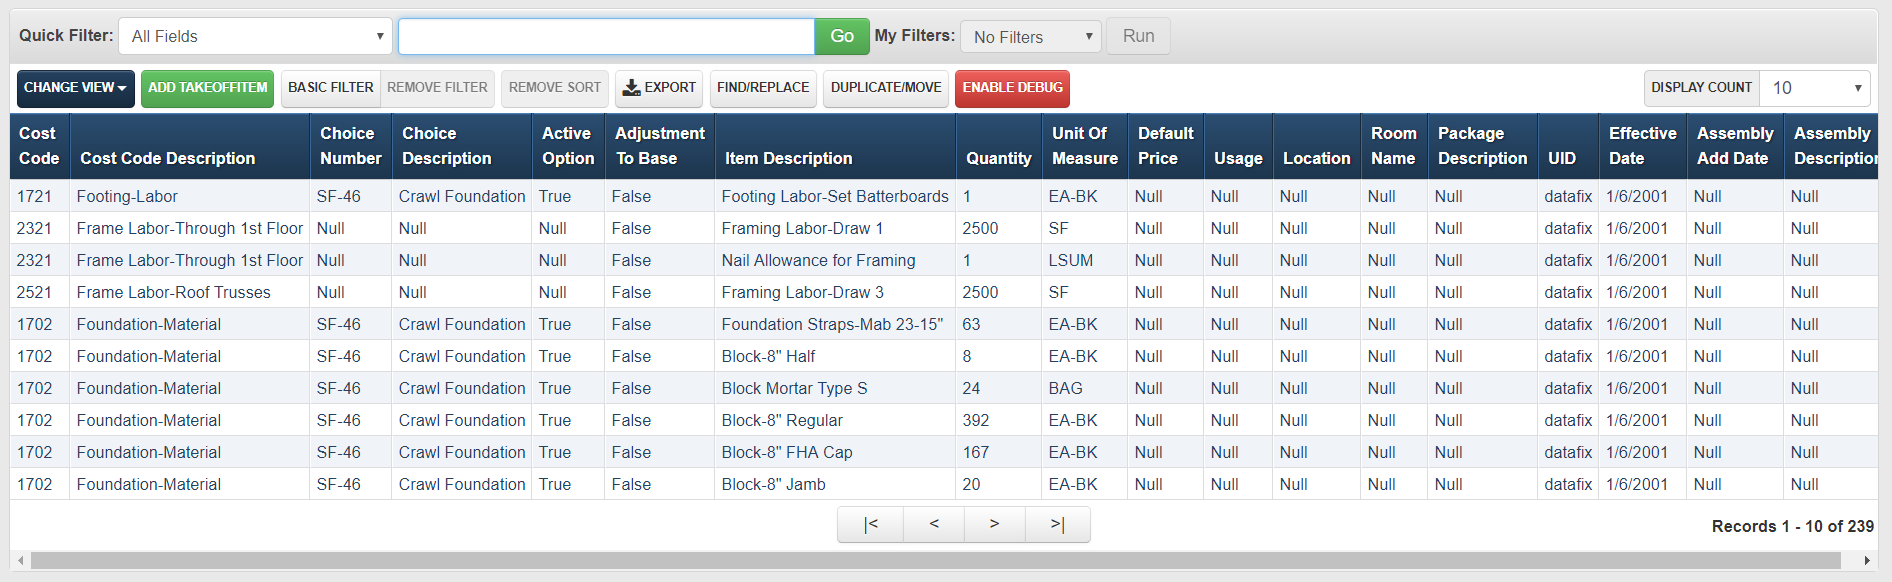
- Click the Takeoff Items link at the top of the plan layer detail screen to navigation to the Plan Layer Takeoff Item browser (shown below).
- Click the Add Takeoff Item button in the browser toolbar to navigate to the takeoff item detail screen (shown below).
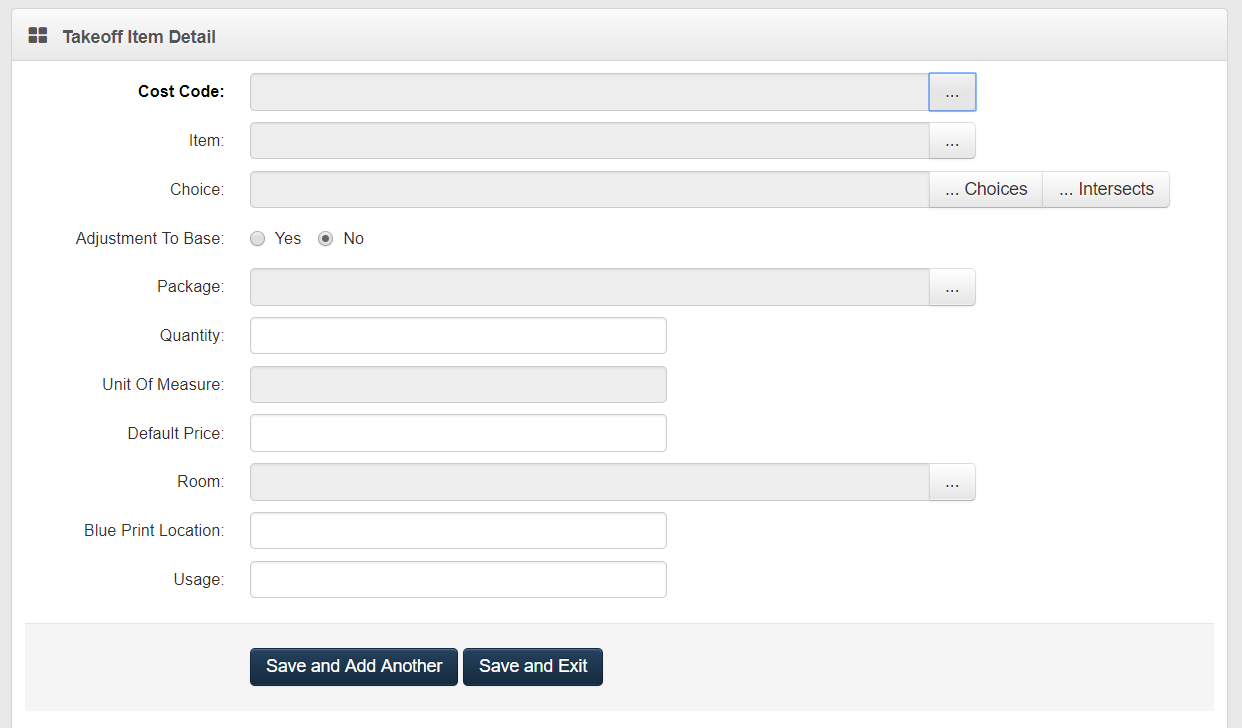
- Enter the Takeoff Item Detail by following the steps below.
Click the pick list button to pull up the cost code list and select the Cost Code.
Click the pick list button to pull up the cost code list and select the Item.
Click the pick list button to pull up the choice or intersect list and select the Choice or Intersect.
Set Adjustment to base to No unless the takeoff item is removing base house material.
Click the pick list button to pull up the package list and select the Package.
Note
Package is used by some builders to determine when the material is delivered. Not all builders use Package.
Enter Quantity.
Enter a Default Price if this is an allocation item.
Click the pick list button to pull up the room list and select the Room.
Note
Room should ONLY be selected if this takeoff item can vary by room in either the community or in the option selections.
- Enter Blue Print Location.
Note
This can be used to group takeoff items on reports and provide vendors with additional information.
- Enter the Usage.
Note
This can be used to group takeoff items on reports and provide vendors with additional information.
- Click Save.
Note
- Cost Code is always required.
- You must enter an Item and Quantity or Default Price or you will not be able to save the takeoff item.
- Entering a Cost Code and Default Price only allows you to allocate dollars without generating a Purchase Order.
- If the item is always used, then do not select anything for Choice.
- If an item changes by community or user selection, select the choice that represents the change.
- If an item results from a choice intersection and one or more choices are selected, pull up that intersect and select it from the intersect list.