Community Configuration
Floorplan Budget Configuration
There are a few key things that must be in the community for the floorplan budget to work:
Community layers must be attached to community configuration
Plan configurations must be set
Standard Features must be set
Standard Options must be set for options to appear on the floorplan budget.
Primary vendors must be set for pricing to appear on the floorplan budget
Adding Plan Configurations
The plan configurations that will be built in a community must be added to Plan Configurations under the Community Layer before floorplan budgets can be created. Adding plan configurations to layers allows builders to offer different versions of a plan based on phases or layers of a community or offer only selected versions of a plan in one community while offering other versions in another community. This reduces the amount of data entry and maintenance for plans.
Example
The Plan 2000 may have five elevations. One of those elevations has a stone front elevation that is only offered in the Jackson Lake community. By assigning the plan configuration in lieu of the plan, the stone front elevation can be added to Jackson Lake only.
To add a plan configuration to a community:
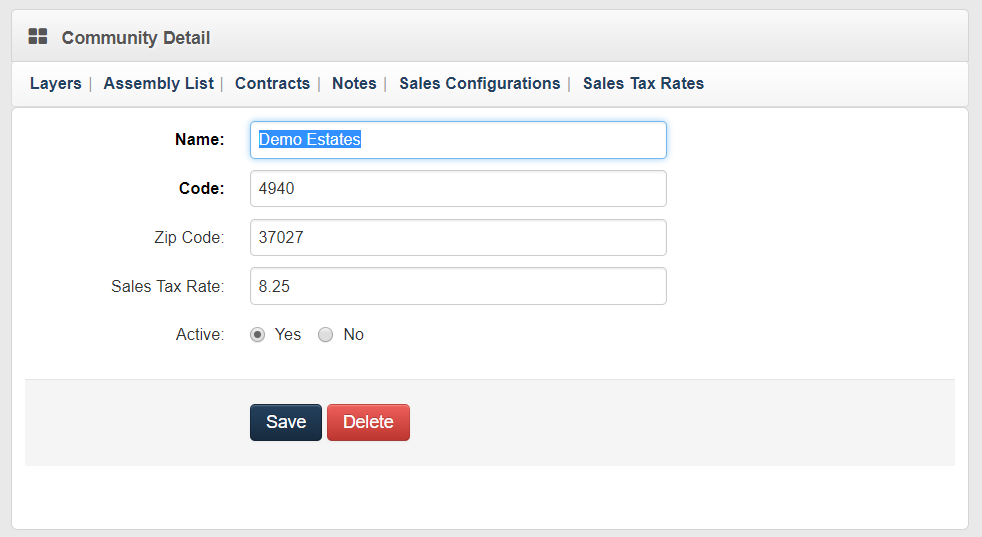
- From the Community list, choose the appropriate community to navigate to the community detail screen (shown below).
- Click the Layers link at the top of the community details screen to navigate to the community layers browser (shown below).

- Choose the appropriate community layer to navigate to the community layer detail screen (shown below).

- Click the Plan Configurations link from the top of the community layer detail screen to navigate to the Plan Configurations side-by-side (shown below).
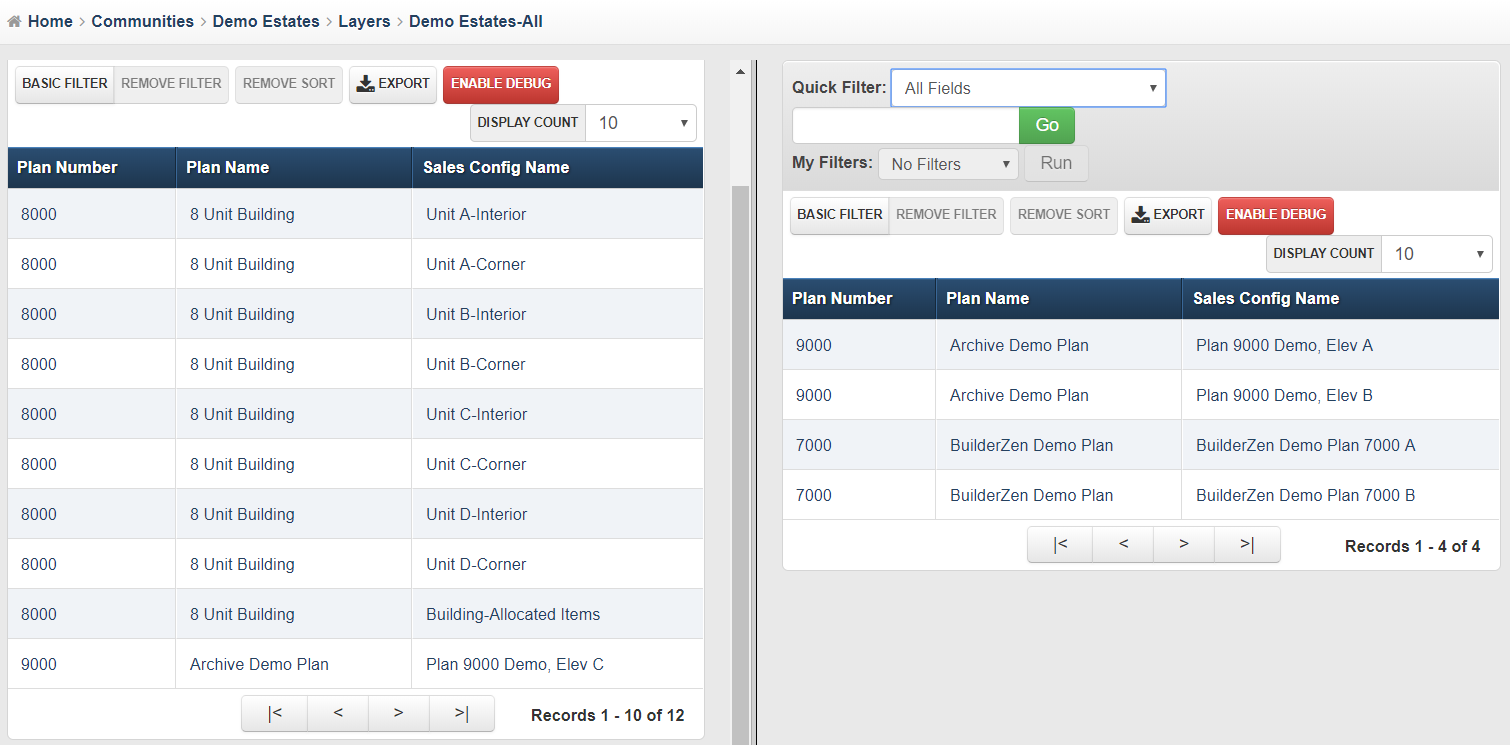
- Add plan configurations to the right side by clicking all of the appropriate plan configurations on the left side of the screen.
Note
The right screen indicates plan configurations that have been chosen. The left side of the screen contains the remaining plan configurations available for selection.
Adding Standard Features
The choices that determine the standard feature codes that BuilderZen will use in building floorplans and job budgets for specific communities must be attached to the appropriate community layer. This is the standard feature for the community that can be subsequently viewed in the Attributes report.
To add community standard features:
Click Communities on the main menu.
From the communities list, choose the appropriate community.
Click the Layers link at the top of the community detail screen.
From the community layers list, choose the specific layer.
Click the Standard Feature link at the top of the community layer detail screen.
Click the Add Community Layer Standard Feature button in the browser toolbar.
Enter the Community Layer Standard Feature Detail information by following the steps below.
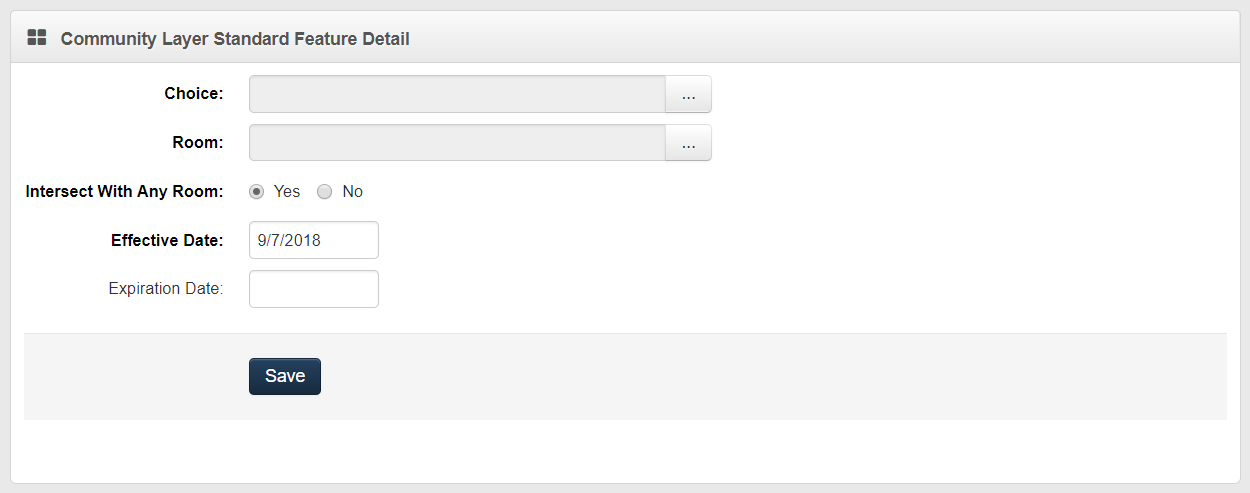
- Click the pick list button to pull up the choice list and and select the Choice to make standard.
Note
This pick list comes from the master choice list under the Master Data section and is the same list used to select standard options.
- Click the pick list button to pull up the room list and select the Room, if appropriate.
Note
Room is used only if room has been used with plan or community takeoff items.
- Select Yes or No for Intersect with Any Room.
Note
By default, Yes is selected. If it is changed to No, any intersections that this standard feature is part of can be pulled into the floorplan budgets (assuming all other choices in that intersection are also part of the community), regardless of the room on the intersect takeoff item.
Enter a new Effective Date. (Required)
Leave the Expiration Date field blank until the standard feature needs to be deleted from the community.
Click Save.
Adding Standard Options
To designate the standard options that will be offered in a community and be reported in the Attribute and Standard Option List, those options must be attached to the appropriate community layer.
To add community standard options:
Click Communities on the main menu.
From the communities list, choose the appropriate community.
Click the Layers link at the top of the community detail screen.
From the community layers list, choose the specific layer.
Click the Standard Option link at the top of the community layer detail screen.
Click the Add Community Layer Standard Option button in the browser toolbar.
Enter the Community Layer Standard Option Detail information by following the steps below.
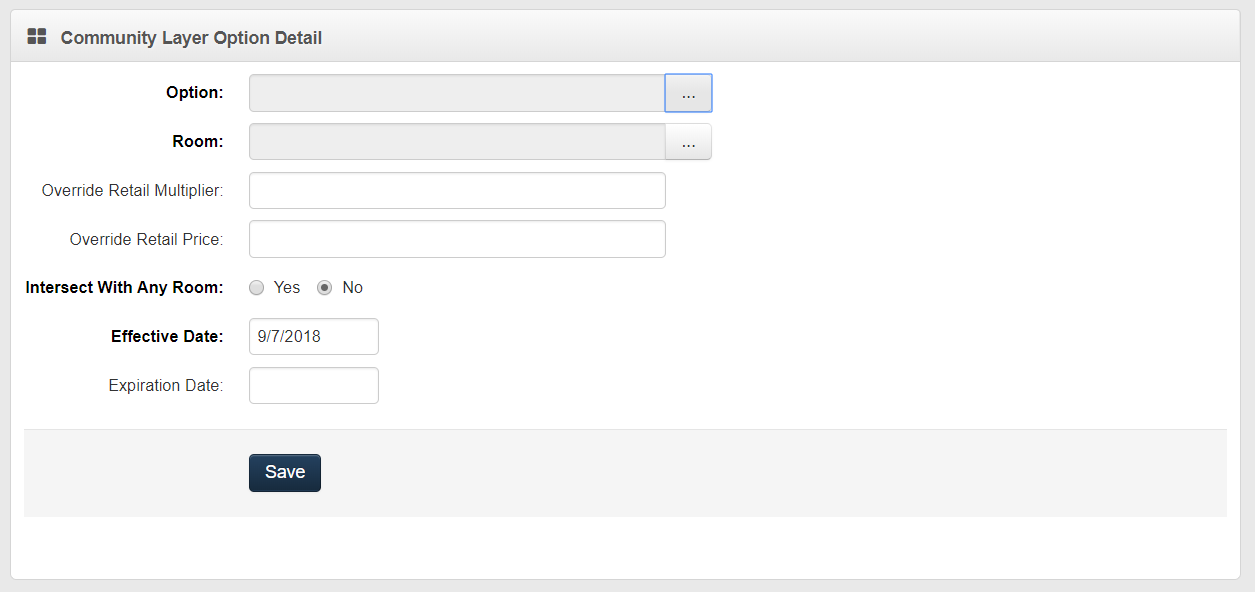
- Click the pick list button to pull up the choice list and and select the Choice to make optional.
Note
This pick list comes from the master choice list under the Master Data section and is the same list used to select standard features.
- Click the pick list button to pull up the room list and select the Room. (Optional)
Note
Room is used only if room has been used with plan or community takeoff items.
- Enter the Override Retail Multiplier. (Optional)
Note
This is to be used when the community's retail multipler varies from the retail multipler setup at the master level for the option.
- Enter the Override Retail Price. (Optional)
Note
This is to be used when the community's retail price varies from the retail price setup at the master level for the option.
- Select Yes or No for Intersect with Any Room.
Note
By default, No is selected. If it is changed to Yes, any intersections that this option is part of can be pulled into the floorplan budget for options (assuming all other choices in that intersection are also part of the community), regardless of the room on the intersect takeoff item.
Enter a new Effective Date. (Required)
Leave the Expiration Date field blank until the standard option needs to be deleted from the community.
Click Save.
Adding Primary Vendors
Primary vendors are the vendors who's pricing is used on Floorplan Budget reports. In addition, the primary vendor is the vendor who will, by default, be used when pricing items in a Job Budget. For every single cost code used in a community, a single Primary Vendor should be set up.
To add a primary vendor to a community layer:
Click Communities on the main menu to navigate to the community browser.
In the community list, choose the appropriate community to navigate to the community detail screen.
Click the Layers at the top of the community detail screen.
In the community layers list, choose the appropriate layer to navigate to the community layer detail screen.
Click Primary Vendor link at the top of the community layer detail screen to navigate to the primary vendor browser (shown below).
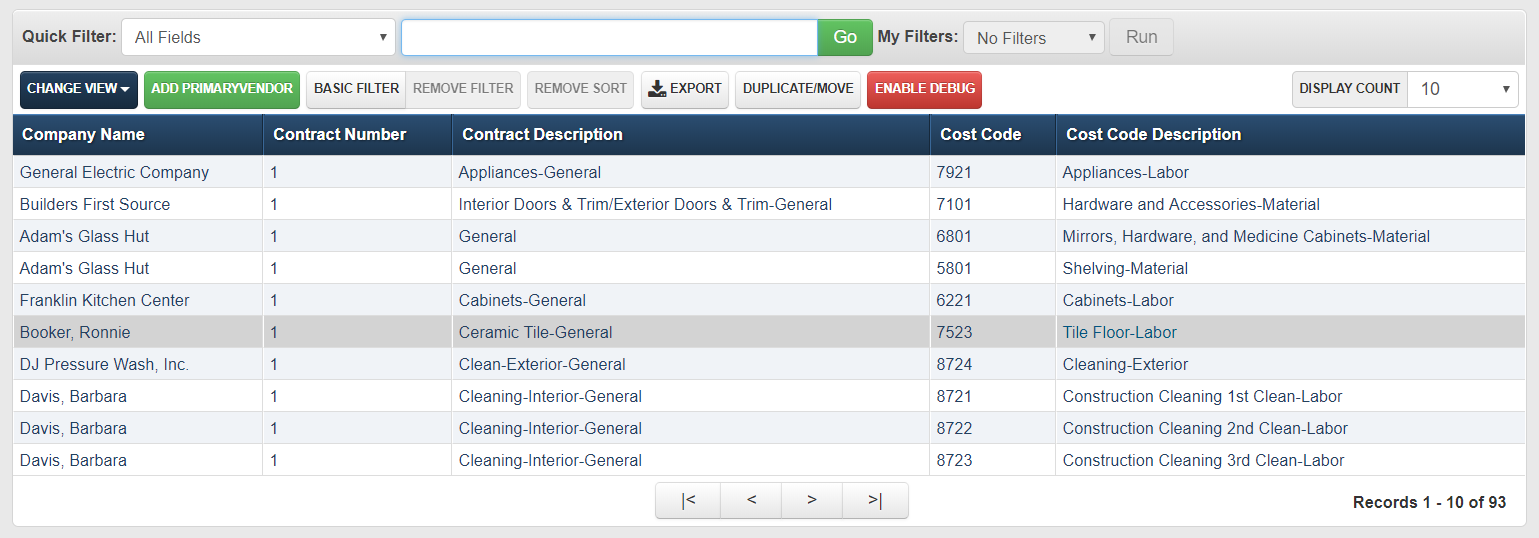
Click the Add Primary Vendor button in the browser toolbar to navigate to the primary vendor detail screen (shown below).
Enter the Primary Vendor information by following the steps below.
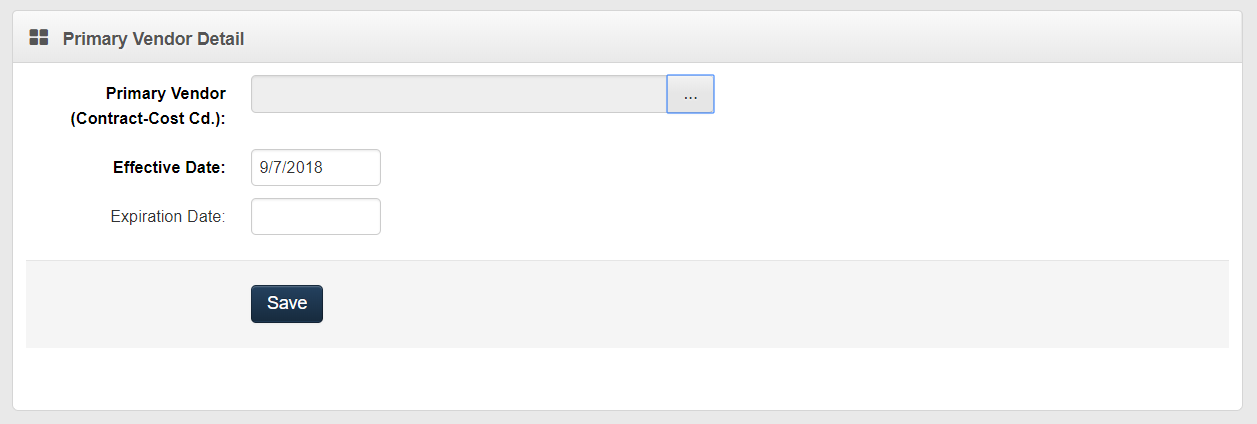
Click the pick list button to pull up the vendor contract list and select the appropriate vendor/contract/cost code combination to designate as primary for a given cost code.
Enter an Effective Date. (Required)
Leave the Expiration Date field blank until the primary vendor needs to be deleted/expired from the community.
Click Save.
Note
Vendor contracts and contract cost codes must be entered for the vendor before 4. an be completed.
Inactivating a Primary Vendor
To change a primary vendor's status to inactive:
Navigate to the Primary Vendor list using the steps outlined above.
Choose the appropriate vendor from the primary vendor list.
Enter an Expiration Date.
Click Save.
Adding Contract Vendors
The additional contracts that can be used in a community must be added to Contracts under the Communities category before any vendor changes can be made to job budgets. The contract list is those vendors that are not primary vendors but may be chosen to perform work in the community.
To add a contract vendor to a community:
Click Communities on the main menu to navigate to the community browser.
From the Community List, choose the appropriate community to navigate to the community detail screen (shown below).
- Click the Contracts link at the top of the community detail screen to navigate to the contract vendors browser (shown below).
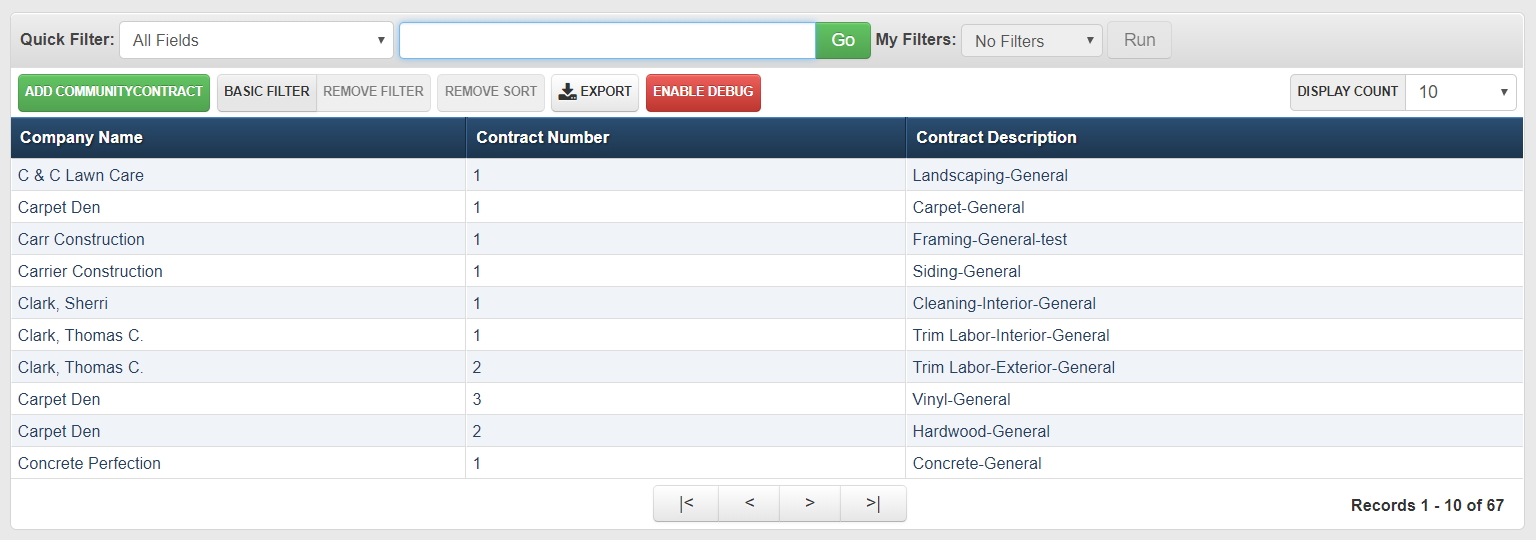
- Click the Add Community Contract in the browser toolbar to navigate to the contract vendor detail screen (shown below).
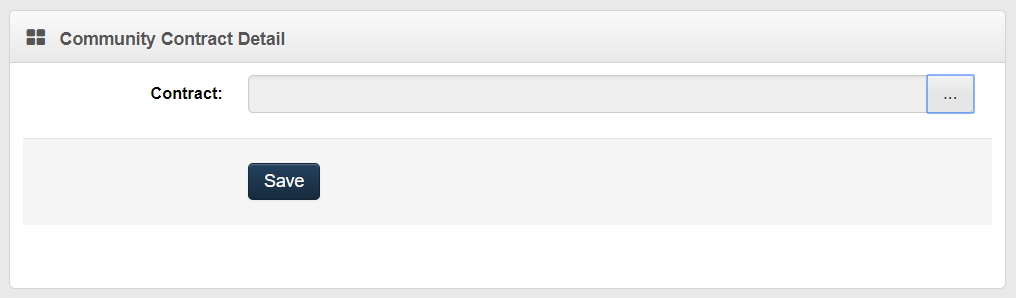
- Enter the Community Contract Detail by following the steps below.
Click the pick list button to display a pick list of all the active vendors from the vendor category.
Click on the selected vendor.
Click Save.
Takeoff Items
The steps for adding takeoff items to community layers are identical to adding takeoff items to Plan Layers. See Takeoff Items in the Plan section for more information.
Takeoff items are added to the community layers ONLY if the takeoff item applies to every plan in a community but does not apply to all communities. The majority of the takeoff items will be entered on the Plan side of BuilderZen Foundations.
Sales Tax Exceptions
When a vendor has a sales tax rate that differs from the community sales tax rate (or the sales tax rate for an individual item differs from the community sales tax rate), an exception must be created to properly calculate sales tax for the vendor or for that single item. The precedence for sales tax, from highest to lowest, is as follows:
| Condition | Precedence | Description |
|---|---|---|
| Contract and Item are specified | Highest Precedence | Both Contract and Item have been chosen. Tax exception applies to a specific item supplied by a specific contractor. Note: Item must be designated as taxable in the Master Item List. |
| Only the Item is specified | Second Precedence | Only the Item is chosen. Tax exception applies to a specific item supplied by any contract. Note: Item must be designated as taxable in the Master Items List. |
| Only the Contract is specified | Third Precedence | Only the Contract is chosen. Tax exception applies to all taxable items supplied by a specific contractor. |
Community Default
Example
If there was an exception for a Mirror-24 from Tennessee Glass at 3%, and the community of Jackson Lake had a default tax rate of 8%. The sales tax for any Mirror-24 from Tennessee Glass for this community would be calculated at the 3% tax rate.
It is unnecessary to add the exception to every layer because there are ways to group layers like a job budget or standard configuration. As long as the exception is created in one of the layers in the group, the system applies the exception to all appropriate items without regard to which layer the item belongs or which layer the exception belongs.
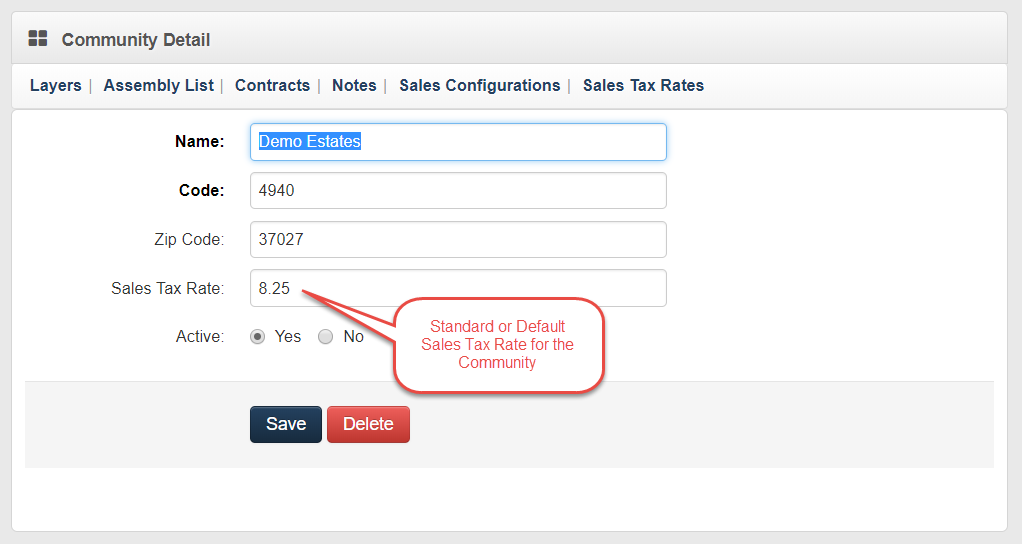
The standard sales tax for a community is entered in the community detail section when the community is initially set up.
Creating Sales Tax Exceptions
When there is an exception to the standard sales tax for a specific vendor or item, the sales tax rate must be entered by completing the following steps:
Click Communities on the main menu.
From the community list, choose the specific community where the sales tax rate varies for a vendor or item.
Click the Layers link at the top of the community detail screen.
From the list of community layers, choose the specific layer where the sales tax exception is required.
Click the Sales Tax Exception link at the top of the community layer detail screen.
Click the Add Sales Tax Exception button in the browser toolbar.
Enter the Community Layer Sales Tax Exception Detail information by following the steps below:
If the sales tax exception applies to a specific vendor contract, click the pick list button to choose a Vendor Contract from the list of all the vendor contracts in the system.
If the sales tax exception applies to a specific item, click the pick list button to choose an Item from the list of all items in system.
Enter a new Effective Date. (Required)
Leave the Expiration Date field blank until the sales tax exception needs to be deleted from the community.
Click Save.
Note
- If a vendor contract only is chosen, all items supplied under that contract will be assessed the exception tax rate.
- If an item only is chosen, that item will be assessed the exception tax rate no matter which vendor supplies it.
- If both a vendor contract and item are chosen, the exception tax rate will be assessed specifically on that item when that vendor supplies it.